Technical Support is available from 8am to 5pm (PST) M - F at support@fslaser.com.
Focus Lens Replacement Instructions
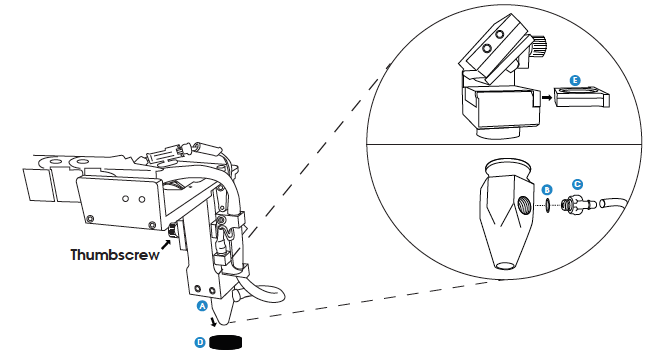
Parts: Air Assist Cone (A) – Fitting O-Ring (B) – Air Assist Fitting (C) – Focus Billet (D)
– Focus Lens w/ case (E)
Instructions:
1. Loosen the focus head thumbscrew, slide the focus head to the uppermost position and tighten thumbscrew.
2. Disconnect air hose by gently pulling it.
3. Using a 1.5 hex wrench (not included), loosen the “set” screw, but do not remove.
4. Remove the current air assist cone.
5. Place the fitting O-ring on the air assist fitting and attach to new air assist cone.
6. Place new air assist cone under focus lens and into slot. Tighten “set” screw with a 1.5 hex wrench. Reattach air hose.
7. Slide the current focus lens out of the slot. This does not require tools. 8. Slide new lens into slot.
Maintenance: The Focus Lens will need, at minimum, weekly cleaning, depending on usage and types of materials used. Only use optical grade lens wipes and gently wipe the surface of the lens clean. Save the case the lens came for storage when switching to a different lens. With any lens, always use the correct focus billet and air assist cone.
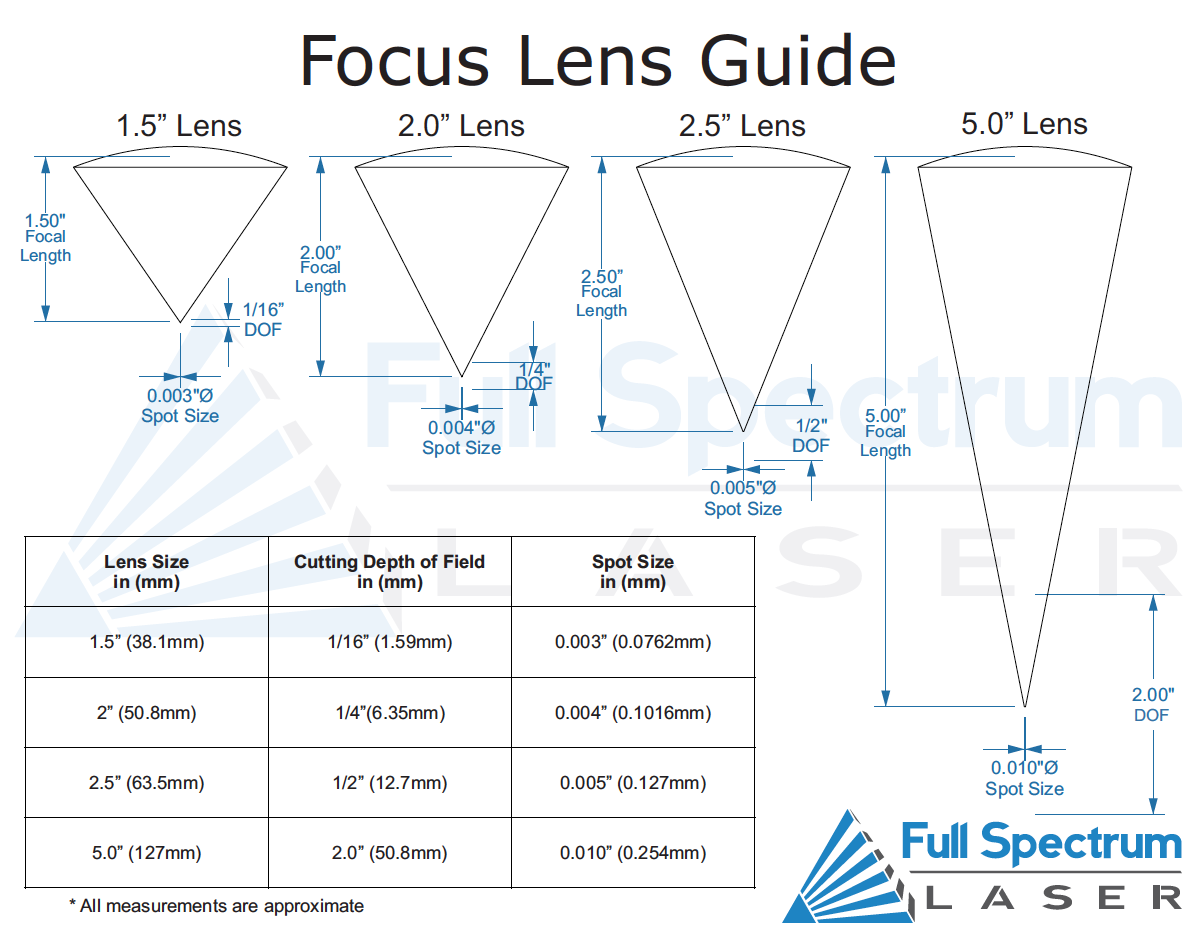
Lens Descriptions:
1.5” lens is appropriate for extra fine engravings such as fonts below 6pts.
2.0” lens* has a good combination of fine engraving and thin cutting for fonts between 6pts and 8pts.
2.5” lens is appropriate for cutting up to ¼” of material and engraving detail to around 8pts.
5.0” lens is for cutting thick foam. it is also a good lens for engraving into deep bowls, when more room is needed.
*This is the included lens for Muse and Hobby Series Lasers.